Recently for one of client, I was in need to setup Git on their intranet. Being healthcare industry and compliance issue, source code could not leave company network and therefore needed in-house solution for Source Code Management (SCM) and automate builds.
In this blog post, I will explain how did we setup Git server that is accessible from anywhere in company network.
We need below two software installed on system which will act as a Git Server.
- Git (Free)
- Bitvise SSH Server (Paid )
First we need to install Git on server and add path of “git.exe” in environment variable, so that we can use git command from console.
Next, we need to install Bitvise SSH Server and set it up. Once, Bitvise SSH Server is installed, we need to follow below steps.
Step 1: Open Bitvise SSH Server control panel as shown in below image
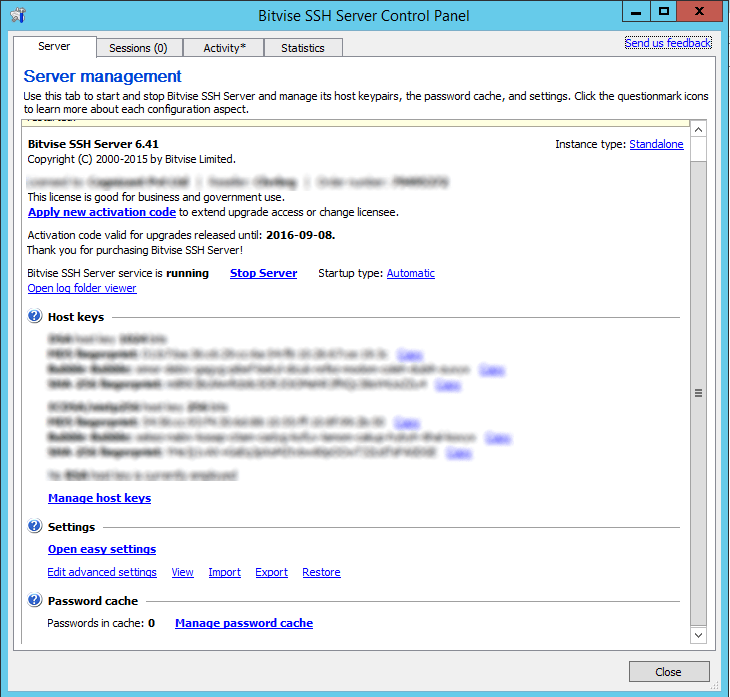
Step 2: Click on “Edit advanced settings”. New pop up window will open as shown in below image.

Step 3: Click on “Windows groups”. New pop up window will open as shown in below image.

In above window, we can define who would have access to Bitvise server. In this case, anyone, who has access to system will have access to bitvise server. However, you can play with these settings to have more granular control.
Step 4: Next step, is to link Bitvise SSH server and Git. Double click on entry in “Windows group” window opened in previous step. New pop up window will open as shown in below image.


Click on “Terminal and exec requests” and make sure below values has been configured.
- Shell access type as Custom shell settings
- Terminal Shell as cmd.exe
- Convert Git Parameters checked
- Initial terminal shell directory as %Home%
- Permit environment variables checked
Once, all above settings are done, create a Git repository on Server. In this example, we will create folder named Git Repo in c drive and Repo1.git inside newly created as shown in below image. we will run command git init –bare to create a git repository which will act as a server.

If you notice in above image, it created multiple folders automatically. When we use “–bare” in “init” command, it says that we are not creating a git client but creating git server.
Now, users on other system needs to connect this repository. In Terminal and Exec Request window, we specified that user will be connected to their home directory. Therefore, to access Repo1.git, we need to go back to c drive (2 level up using .. notation) and then navigate to Repo1.git. We will be using below command on client machine.
git clone “ssh://username@remoteServerIpAddress/~/../../Git Repo/Repo1.git”
In above command, username will be replaces by windows username and remoteServerIpAddress will be replaced by actual IP address of server. On successful connection, user will be prompted for windows password. Once user is able to clone repository, they can perform all git activities as usual.
It is possible that user may receive below error while cloning git repository.
‘git-upload-pack’ is not recognized as an internal or external command.
Above error is self-explanatory, we need to make sure that path to ‘git-upload-pack’ folder should be configured in environment variable.
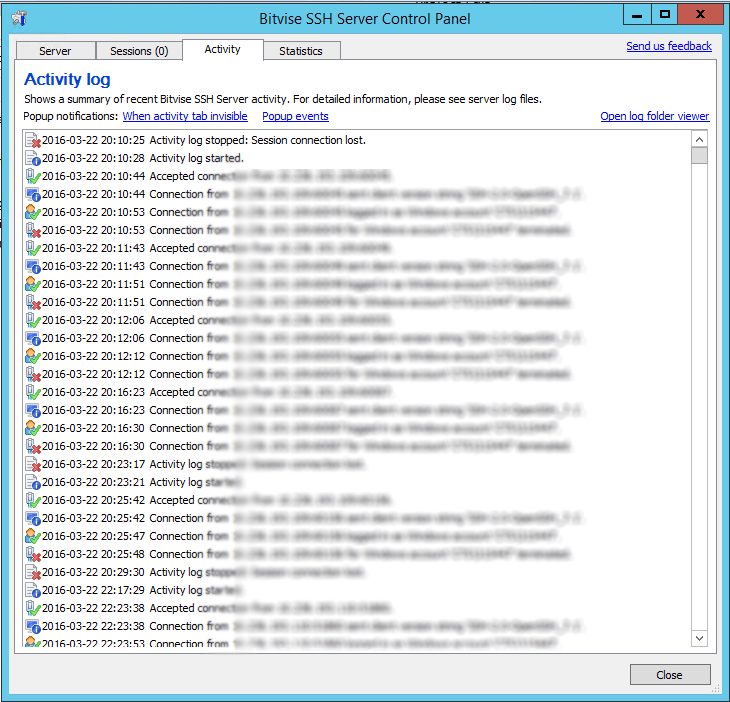
To troubleshoot connectivity issue, we can use Activity log of Bitvise SSH Server as shown in below image. User can also click on open log folder viewer to dive into detailed log files.
Leave a Reply