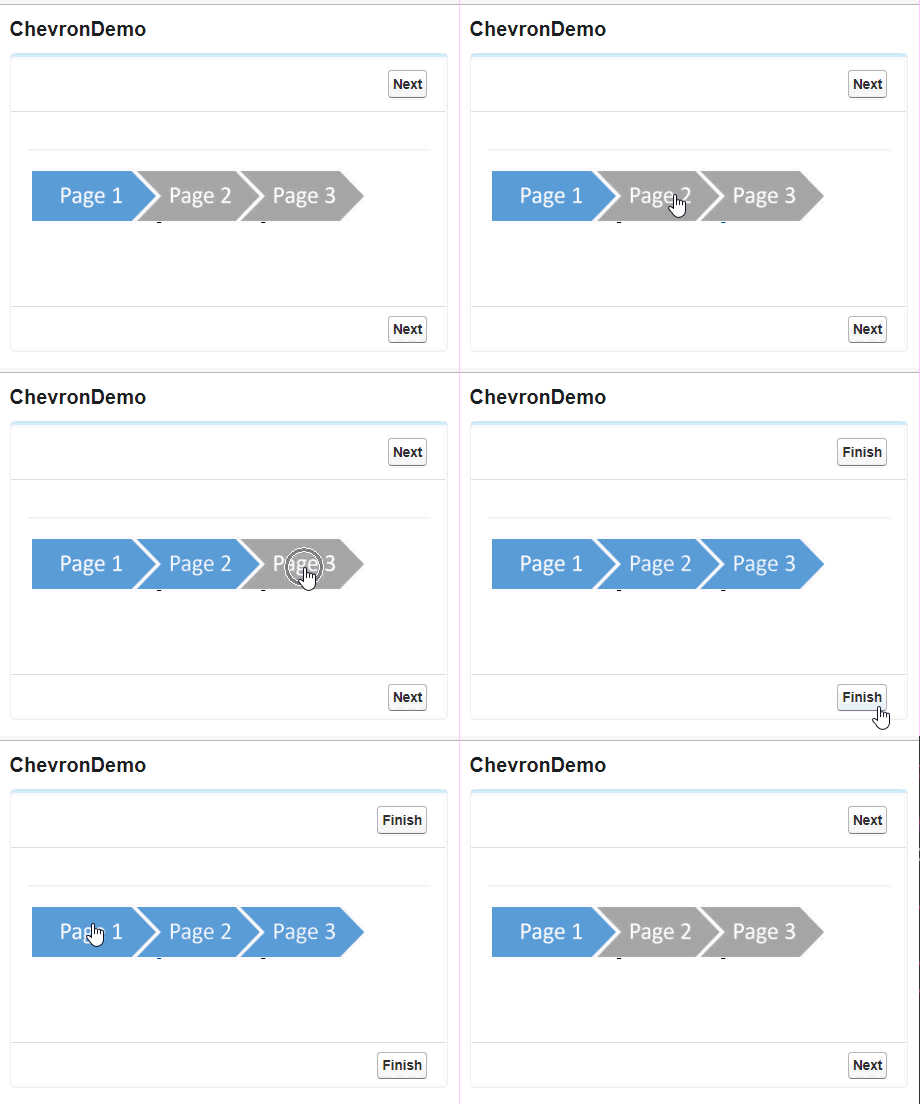
Chevron Component in Flow

Create Breadcrumb Or Chevron Control in Salesforce Flow

Have your end user complained or wanted some more coolness from Flow ? Do they want to have a nice clickable graphical presentation at top of page showing their progress or page number ? Recently, I was having a discussion with my colleague on same requirement. User should be able to jump between pages and at the same time, pictorial status should be displayed. Can we do it in Flow ? Can we create a chevron control or breadcrumbs in Salesforce Flow. Answer is yes.

Winter 18 has lots of cool functionalities for flow and we should not be left behind in adopting flow as part of our solution, at last, its point and click instead of code.

I will take help of my previous article, which explains how images can be used in formula field from static resources. In our case, instead of formula, we will use Display Text component in Flow. For this post, you can upload this zip file as a static resource and use in FlowThis zip file contains total 6 images for three pages, active and inactive images.

Getting image URL from static resource for Flow

Once image is uploaded as zip file in Salesforce, there is view link which will give us the URL of images. Basically, it has below format :

/resource/<staticResourceID>/<staticResourceName>/<imageName>

Creating Flow with Chevron / Breadcrumb component

Below image shows overall flow structure. It has three screens and on basis of stepNumber, we decide which screen to open.

Salesforce Flow - Chevron Component
Salesforce Flow – Chevron Component

All three screens has Display Text with below source code. If you observer carefully, only change is image source in all three screens. For the readability purpose, HTML is properly formatted, make sure there is no new line in whole code, otherwise image would be rendered in new line instead of on same line.

Below image shows sample screen. In same way, other two screens can be configured.

Salesforce Flow - Chevron Component - Sample Screen
Salesforce Flow – Chevron Component – Sample Screen

Posted

in

by

Tags:


Related Posts

Comments

4 responses to “Create Breadcrumb Or Chevron Control in Salesforce Flow”

  1. Arun Avatar
    Arun

    Hello Jitendra,

    Thank you for posting this article. I am stuck at how the navigation between the pages is done depending on the stepNumber you have used. It would be great if you could give an insight on how to leverage the stepNumber to render the pages.

    1. Shravan Avatar
      Shravan

      Hi Arun , Step Number is a variable that needs to be created here and I hope you havent confused that with the steps of flows. Also make sure that the default value of the step number to be 0.

  2. stuart Avatar
    stuart

    This would be a great post if you could add some information that would make it possible to re-create.
    1. Where exactly are files uploaded? In setup or in the Salesforce Files object?
    2. How do you determine the staticResourceID etc of the images

  3. stuart Avatar
    stuart

    There was some missing info. This is my update to the blog:
    Steps to Reproduce:
    In setup go to Static Resources. Add the zip from the url https://www.jitendrazaa.com/blog/salesforce/create-breadcrumb-or-chevron-control-in-flow/
    Note: the image zip file url is https://www.jitendrazaa.com/blog/wp-content/uploads/2017/10/ChevronImages.zip
    Name the resource Chevron
    Once uploaded Click on the zip. You will see View File as a Link. Right-click and Select Copy Link Address:
    https://usnassf-dev-ed–c.visualforce.com/resource/1527763586000/Chevron?isdtp=p1

    1527763586000 represents the ID of the zip:

    Create a constant called chevronZipID with value of 1527763586000

    Go to your Flow.
    Create four stages. Name them stage 1, stage 2, stage 3
    NOTE: Set each stage active
    Create a variable called stepNumber with the default value to 0.
    Create three screens.
    On the first screen add a display enter the text. The image contains a link which sets the stepNumber parameter.

    Note: There must be No Whitespace:

    On the first screen add a display enter the text:

    On the third screen add a display Field and enter the following default value:

    You can flow through the flow using the default buttons. However, you can also click on the different step images of the flow.

    Decision Element 1: Checks stepNumber.
    If 1 go to Assignment (Set {!$Flow.CurrentStage} = {!stage_1} And a flow to Screen 1

    Else go to Decision Element 2
    Decision Element 2: Checks stepNumber.
    If 2 go to Assignment (Set {!$Flow.CurrentStage} = {!stage_2} And a flow to Screen 2
    Else go to Decision Element 3
    Decision Element 3: Checks stepNumber.
    If 3 go to Assignment (Set {!$Flow.CurrentStage} = {!stage_3} And a flow to Screen 3
    Else go to Assignment (Set {!$Flow.CurrentStage} = {!stage_1} And a flow to Screen 1
    Stage 4: After Screen 3 there is one more Screen. This screen shows a summary.
    Create an Assignment (after screen 3) that assigns the current stage to (Set {!$Flow.CurrentStage} = {!stage_4} And a flow to Screen 4.
    Create a Screen with a summary of the info gathered.

    Why a Screen 4? Well, if the user clicked on the image, somehow this broke the Flow. The third Screen did not refresh properly, so adding a fourth screen allowed for the flow to end naturally:

Leave a Reply

This site uses Akismet to reduce spam. Learn how your comment data is processed.

Discover more from Jitendra Zaa

Subscribe now to keep reading and get access to the full archive.

Continue Reading